Installing Mac OSX 10.6 in VMware Player

Macintosh really has a fantastic UI. I once installed OSX 10.3 successfully using pearpc, but it was awfully slow, since it need to emulate PowerPC via software layer. And now, I just successfully installed OSX 10.6 Snow Leopard in VMware player 5.0.2. The equivalent workstation version is 9.0.2. I tried virtualbox, but it just did not work. Now, please follow my steps:

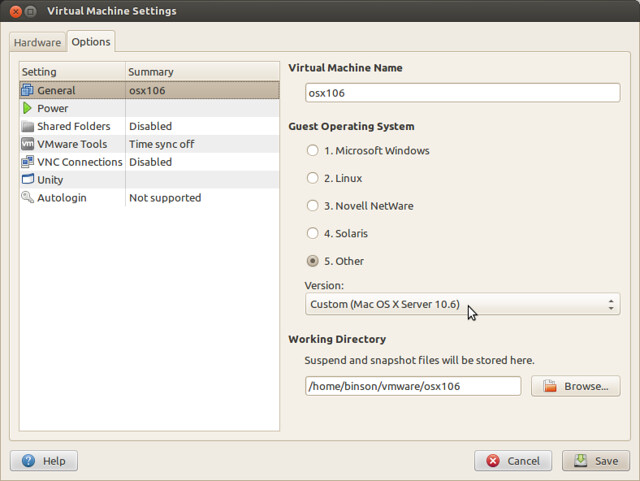
1. Create a new VM and select the OS type as “FreeBSD”.

2. Close the VMware player. Open the *.vmx file find the line:

Change to:

Start VMware player again. The OS type is now set to “Mac OSX 10.6 Server”:

osx106_1

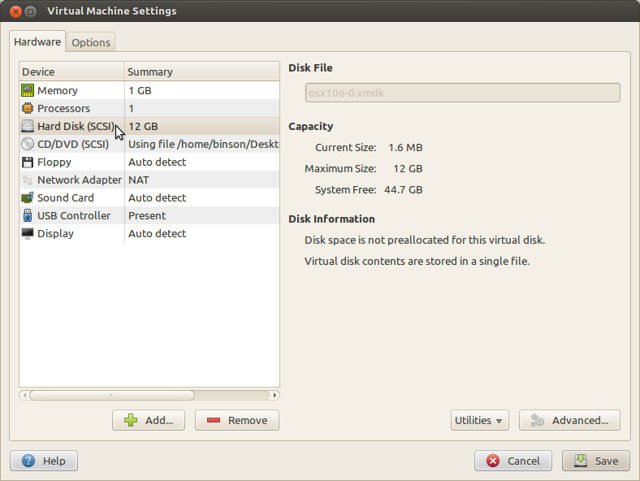
3. Modify VM: set Memory to 1G, check “Accelerate 3D Graphics”. Now, here’s the most _important_ step: Remove your existing hard disk, and add a new one, but choose SCSI as the virtual disk type. Change the CD/DVD device to also use SCSI type via the “Advanced” button. Without these steps, you will encounter the famous “still waiting for root device” error. Seems OSX cannot handle IDE devices correctly. 🙁

osx106_2

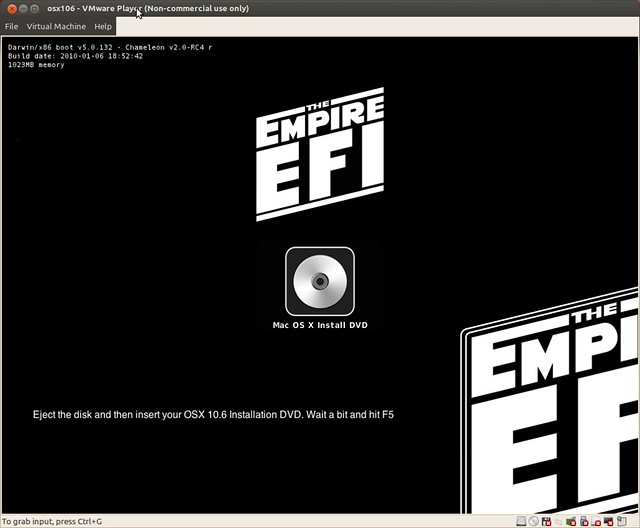
4. I used EmpireEFI v1085 to boot and install OSX 10.6, please find both images for your own. When EmpireEFI boots finishes, mount the OSX 10.6 image and press F5 to refresh. VMware player 5.0.2 supports *.dmg file directly, please select all files to find the image:

osx106_3

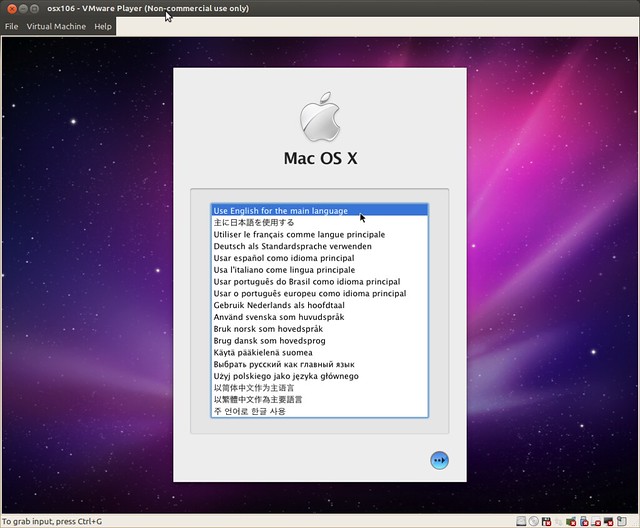
5. Here we go, just press enter and you will be booted into OSX installer:

osx106_4

6. If the disk drive doesn’t appear under “Select the disk where you want to Install Mac OSX”, go to menu Utility –> Disk Utilities and erase the whole disk:

osx106_5

7. The disk should now appear. You may want to customize the installation by clicking the button in left-bottom corner. Then let’s move on:

osx106_6

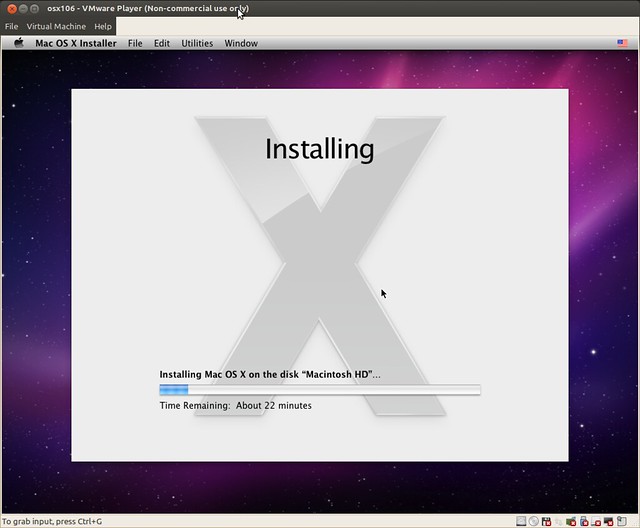
8. When finished, the system will reboot automatically. And it will fail. We must still use EmpireEFI to boot. But we select to boot OSX this time:

osx106_7

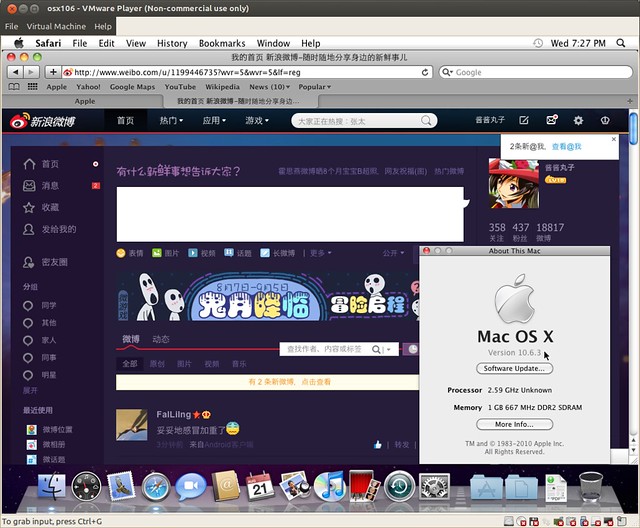
9. After some simple configuration, you will finally have your OSX desktop. Cheers!

osx106_8

Updated Aug 23:
The EmpireEFI did not work after I upgraded to 10.6.8. Kernel panic appeared like:

I used iBoot 3.3 to replace EmpireEFI, and booted successfully.

osx106_9

You will have App Store(available in 10.6.6+) in your menu after upgrade. I also installed Xcode 3.2.6 which can still be downloaded from Apple. It requires 10.6.6 too.

Customizing Ubuntu Image with UCK

UCK stands for Ubuntu Customization Kit: https://launchpad.net/uck

We can use PPA to install it:

And you’ll find it in under “System Tools” section of your menu. Follow the wizard to create your own Ubuntu image. It will extract your Ubuntu image, and also the squashfs on it. 5G free disk space is required under ~/tmp. The final customized image locates as ~/tmp/remaster-new-files/livecd.iso.

I tried to use a 10.04.4 image as base image. It ends with message:

Don’t worry. The final image is already created. isohybrid is in syslinux package 3.72 and later. But Ubuntu 10.04 has only 3.63.

Now you can use the image like the source image. Either burn it or use it to install from harddisk. I integrated all Chinese supports, codecs and some development tools. See screenshot of my livecd:

ubuntu_uck

Root Galaxy Nexus with Android 4.1 Jelly Bean

Just tried to root my GSM Galaxy Nexus manually several days ago. I followed the instruments on the XDA forum here and here. File used are placed in my skydrive.

  1. Download root package (SuperSU-0.93-Busybox-1.20.2.zip)
  2. Download CWM (recovery-clockwork-5.5.0.2-maguro.img)
  3. Reboot into Fastboot Mode: Power off your device and (Power + Volume Up and Down)
  4. Unlock the bootloader if locked (fastboot oem unlock) then reboot into fastboot mode again
  5. Temporarily flash CWM (fastboot flash recovery recovery-clockwork-5.5.0.2-maguro.img)
  6. Boot into recovery (Press Volume Up twice until you see “Recovery mode” then press the Power button)
  7. Using CWM recovery, install SuperSU-0.93-Busybox-1.20.2.zip that you downloaded in step 1. The file should be placed in your /sdcard folder.
  8. Reboot into the OS
  9. You are now rooted

iOS 5 Device Support in Ubuntu Lucid 10.04

Seems it’s quite easy to make my iPod touth 4 (iOS 5.0.1) work. 2 packages need update using PPA here. Or you can simply download them and install:

Now your audios/videos in your iOS devices are recognized in Rhythmbox :).

Reset GNOME Keyring Password on Ubuntu

http://ubuntu-tutorials.com/2010/01/16/reset-gnome-keyring-password-on-ubuntu/

Just copy the solution here:

Method 1:
It is possible to clobber your keyring passphrase and settings from the Terminal. Open a terminal (Applications > Accessories > Terminal), and run the command:

On older systems you may need to try:

Method 2:
The second method bypasses the Terminal and uses the graphical interface strictly. To delete your current keyring, follow the steps below:

  1. Navigate to Applications > Accessories > Passwords and Encryption Keys
  2. Select the far-right tab “Passwords”
  3. Select your keyring
  4. Right-click and attempt “Change Password” or, if that doesn’t work, select “Delete”

X11 Forwarding over SSH

First, you should install a SSH server:

The configure files are located in /etc/ssh/sshd_config. The default ones are OK.

Now connect your server by command below. The -X flag enables X11 forwarding, through which a user can access the local X11 display:

I use Ubuntu as host, and CentOS as guest in VirtualBox. The default NAT network mode does not allow you to access a guest from host. I just change the network mode to Host-only Network, and the problem is solved.

Here gives a screenshot: ubuntu-tweak is running on CentOS:

ssh_x11forwarding

Encoding MP4 Files for iPod on Ubuntu 10.04

I used mencoder utility to convert my video files. But it was compiled without libfaac. So if you specify AAC encoding, an error occurs. Details and solutions can be found here. I just added the Medibuntu repository as described:

NOTE: ffmpeg utility in Lucid release does not support *.rm/*.rmvb yet.

Then install mencoder and codecs:

Now you can convert videos. Here’s a sample to convert a *.rmvb(848×480) to a *.mp4(320×240):

Modify fps/codec/bitrate values as you wish. The aglobal & vglobal options seem to be essential for iPod.

In order to keep video aspect after scaling, the output file should be 360×204. we use the -vf-add filter to add black band to the top and bottom of it. Other command line options, please refer to its manpage.

Lastly, install gtkpod to import your *.mp4 files.

Updated Mar 27, 2012: The above command line is for iPod Nano. For high quality H264 encoding used in iPod Touch or iPhone, run:

Using WebDAV in Apache

From wikipedia http://en.wikipedia.org/wiki/WebDAV:

Web-based Distributed Authoring and Versioning (WebDAV) is a set of methods based on the Hypertext Transfer Protocol (HTTP) that facilitates collaboration between users in editing and managing documents and files stored on World Wide Web servers. WebDAV was defined in RFC 4918 by a working group of the Internet Engineering Task Force (IETF).

The WebDAV protocol makes the Web a readable and writable medium, in line with Tim Berners-Lee’s original vision. It provides a framework for users to create, change and move documents on a server (typically a web server or “web share”). The most important features of the WebDAV protocol include:

  • locking (“overwrite prevention”)
  • properties (creation, removal, and querying of information about author, modified date et cetera);
  • name space management (ability to copy and move Web pages within a server’s namespace)
  • collections (creation, removal, and listing of resources)

I used Apache to experience the WebDAV. The server was built and installed from source with:

The “prefix”, “layout”, “mpm” switch is not necessary, since these are the default values under Unix. Now modify the configure files to support WebDAV access:

The “var” and “uploads” directory, the “DAV-upload” realm, “user.passwd” file, “user” and “admin” user account are referred by “conf/extra/webdav.conf”. While the “daemon” user and group are referred by “conf/httpd.conf”.

Then modify “httpd.conf” to include “webdav.conf” the apache server. It a single include directive. Now start the apache server by running:

Our WebDAV directory is /uploads. So here’s the address on how to access it:
– In nautilus: dav://192.168.1.100/uploads
– In konquer: webdav://192.168.1.100/uploads
– In windows: Go to –> My Network Places –> Add a network place –> Internet or network address –> Enter (http://<user>:<password>@192.168.1.100/uploads) –> Finish!

Speeding up Qt Building

As starting with version 4.4, the size of Qt source grows extremely fast. It take hours or even a entire afternoon to build it with full feature enabled. Since I do not use advanced features like Webkit or Phonon, I always build Qt with them disabled. I will show and explain my configure parameters in 4.3 and 4.6 in both windows and linux build in this article.

Windows Build

v4.3, just disable the qt3support module:

v4.6, more modules are disabled:

Qt4.4 added concurrent, webkit, phonon and xmlpattern code, and the format of help files was changed.

Qt4.5 added the gtkstyle. In configure script, -make and -nomake switch are added. But official support for VC6 and VS2002 were dropped. Actually, VC6 generates incorrect code.

Qt4.6 added javascriptcore backend for QtScript module. So I added the “-no-script” switch.

Maybe you have noted, there’s no “-no-make” switch exists before Qt4.5. So, how to exclude building of demos and examples? I looked into the v4.5 source code of configure.exe(located in $QTSRC/tools/configure), and found all “no-make” parts are just excluded by writing to a .qmake.cache file. After running configure, the .qmake.cache file may have a line like:

Now just keep the first 2 entries.

Linux Build

From v4.6, there’s only one all-in-one source package, no separate platform-specific source packages are provided. I firstly chose the qt-everywhere-opensource-src-4.6.3.zip. But even its configure script did not run. Finally, I found it’s a line ending issue, and we need to convert it first using dos2unix utility.

Now convert line endings:

The first 3 lines ensure running of configure script. The last line ensures correct generation of makefiles. Without it, no separated debug info are generated and you may also encounter errors when linking the assistant application as described in QTBUG-5471. The qt-everywhere-opensource-src-4.6.3.tar.gz with *nix line endings does not need above steps and may have less undiscovered build issues.

I’ve tested this approach under Hardy(Ubuntu8.04) and Lucid(Ubuntu10.04). Under Lucid, the dos2unix/unix2dos utility seems to be renamed to fromdos/todos. Just replace the command name.

We can configure it now:

v4.3, as easy as windows:

v4.6, we do not have s60 and gesture switches:

After running configure, modify the .qmake.cache file to remove unnecessary entries.